Building Toys for Ages 5+: 5 Building Projects & Tips for Home
At a Glance
- Building toys for ages 5+: aim for 5–20 minutes per mini project rather than a marathon.
- Getting started: few pieces, a wide base, build first – decorate later.
- Safety: check the age recommendation, warnings, manufacturer details and CE mark.
- 5 ready-to-go build ideas: bridge, crane, racer, ferry, marble run loop.
- If it wobbles: add a support in the middle, widen the base, free up the axles.

Building toys for ages 5+ work best with small, clear building tasks and lots of “figuring it out yourself”. By five, many children are already real tinkerers – only their patience is sometimes still set to North Sea weather: it can be wonderful, or it can suddenly turn. In this guide you’ll find a simple start checklist, 5 complete building projects (with time needed, difficulty level and troubleshooting help) and a few relaxed tricks to turn “That’s never going to work!” back into “Look, it rolls!”.

Ulli & Flo
Owners of bieco · Hamburg · parents themselves
We know how it goes: at 5, “building” quickly turns into “I’m going to try that again!”. With mini projects and short breaks, things stay relaxed at your place. Feel free to browse our collection Toys for Ages 5+.
What Kids Can Usually Already Do Well When Building at 5
At 5, planning and connecting works well – just in manageable steps. Many children can now follow picture instructions better, choose pieces deliberately and come up with their own improvements (“If I support it here, it holds.”). At the same time, their frustration tolerance can still be a bit delicate – completely normal. That’s why mini goals work wonders: base first, then test, and only then the “frills”.

Building toys are toys that let children assemble individual pieces into working structures. The benefit is very practical: it’s not just about “stacking high”, but about rolling, turning, carrying, balancing – in other words, “Why does this work the way it does?”.
- Fine motor skills with a plan: grasping, plugging in, screwing, loosening – and thinking ahead while doing it.
- First ideas about stability: wide stands better than tall (and is less likely to topple onto a big toe).
- Stamina in stages: 10–20 minutes of focused building is often more realistic than “an hour”.
Which Types of Building Toys Suit Ages 5+?
The most rewarding systems are those that connect quickly and stand stably. From five on, a mix of “quick success” and “a little puzzling” pays off. Too fiddly is a nuisance – too easy gets boring after three minutes.

- Snap-together systems: quick, motivating, perfect for spontaneous building ideas.
- Screw and tool building sets: great for tinkering, as long as the screws/nuts are child-friendly.
- Magnetic building pieces: building is fast, rebuilding is even faster – many kids love that.
- Gear and mechanics sets: for children who love to ask “Why does this turn?” (so… almost all of them).
Practical tip: To get started, put out just 20–30 pieces. Less choice = less rummaging, more building.
How Can You Tell Whether Building Toys Are Safe?
The quick safety round: age recommendation, warnings, manufacturer details and CE. With building sets in particular, small parts are an issue – and with some sets also strings, hooks or metal parts. A quick look before the first playtime saves discussions later (and searching under the sofa).
Safety note: If children under 3 live in your household: always store the building set out of reach after playtime – small parts are a real hazard.
- CE marking: toys need a CE marking in the EU (according to the Bavarian Consumer Portal).
- CE is not a test seal: CE does not automatically mean independent prior testing, but manufacturer responsibility (according to the Bavarian Consumer Portal).
- Warnings & age: read carefully, especially when it comes to small parts/choking hazards.
- Manufacturer details: name and address must be provided (according to the Bavarian Consumer Portal).
The EU Toy Safety Directive is the basis for safety requirements for toys in Europe. In Germany it is implemented through the 2nd ProdSV, among others; that explains why packaging carries so many mandatory details (see Federal Ministry for the Environment).
Ready in 5 Minutes: The Craft Table Checklist
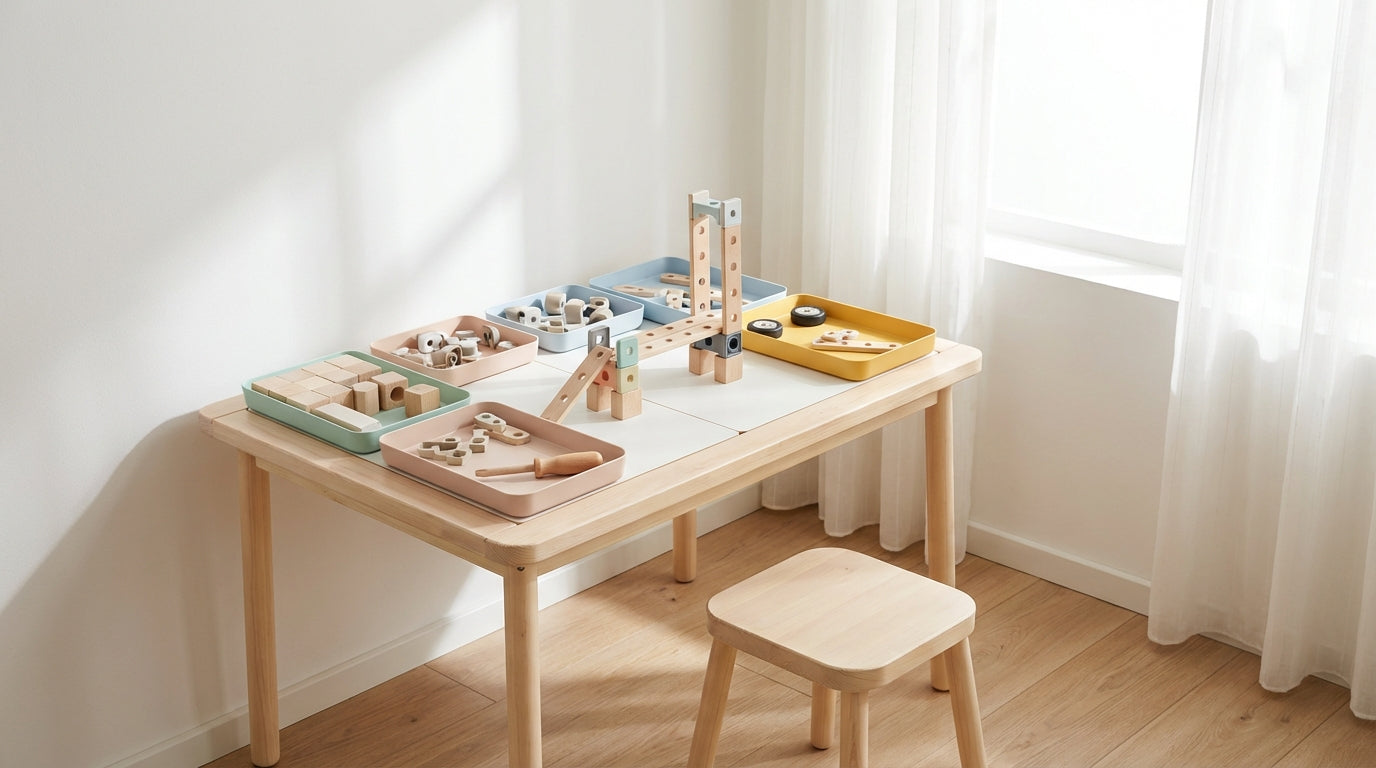
A calm start mainly needs a clear surface and a few small organizing aids. Children build better when nothing wobbles, rolls away or disappears into the carpet. And you don’t have to keep saying “Wait, let me just find…”.

- Firm surface: table or hard floor; carpet is a small-parts trap.
- Sorting tray: muffin tin, flat bowl or tin for connectors/screws.
- “Parking lot”: small box for finished assemblies (wheels, supports, booms).
- Mini rule: build first, decorate later (otherwise everything ends up stuck on crooked).
Practical tip: Set a timer for 12–15 minutes. A short break, a sip of water, then round two – this often saves the mood.
5 Building Projects with Building Toys for Ages 5+ (Including Troubleshooting)
These projects work with many building sets – you just adapt the connections. Whether snap-together pieces, a screw system or a mix: the idea stays the same. And if you wonder whether you’re building “correctly”: as long as it holds and is fun, it’s correct.
Project 1: The Sturdy Bridge
A good bridge can take a bit of weight – and shows children statics without a lecture.
- Difficulty: easy
- Time: 10–15 minutes
- You’ll need: 2 “towers”/supports, 1–2 long beam pieces, 1 middle support, optional railing
- Build the foundation: one wide tower each on the left and right (better 2–3 pieces wide than tall).
- Place the beams: connect 1–2 long pieces across the top.
- Add the middle support: put a support under the middle of the beam – this is usually the stability booster.
- Test: first a marble, then a toy car, then a cuddly toy (building up step by step makes kids proud).
- If-then troubleshooting: If the bridge sags, add a second middle support or use two beams side by side.
- If-then troubleshooting: If the towers tip over, widen the base or build them lower.
Project 2: The Mini Crane (Turn, Lift, Set Down)
A crane is pure joy because it “can really do something”.
- Difficulty: medium
- Time: 15–25 minutes
- You’ll need: wide base, mast, boom, counterweight, hook/loop/little basket
- Base: build a wide square/rectangle as the base.
- Mast: place a tower in the middle of the base.
- Boom: build an arm sticking out to the front – short at first, extend it later.
- Counterweight: attach a small weight at the back of the mast (a few pieces are often enough).
- Hook: depending on the system, attach a loop, clip or little basket.
- If-then troubleshooting: If the crane tips forward, shorten the boom or enlarge the counterweight.
- If-then troubleshooting: If the hook doesn’t hold anything, use a little basket instead of a loop.
Project 3: The Racer with Fat Wheels
A vehicle that really rolls instantly turns building into playing.
- Difficulty: easy to medium
- Time: 10–20 minutes
- You’ll need: flat chassis, 2 axles, 4 wheels (big ones are great), spacers/connectors
- Chassis: build a flat base plate or two long rails in parallel.
- Axles: insert two axles as straight as possible.
- Wheels: add big wheels – they forgive carpet edges and small crooked spots.
- Body: seat, handlebars, spoiler – whatever you like. (This is the part where kids shine.)
- Test drive: give it a push and listen: is something scraping anywhere?
- If-then troubleshooting: If the racer doesn’t roll, check: wheels free? Axle stuck? A spacer between wheel and chassis often helps.
- If-then troubleshooting: If it wobbles, align the axles in parallel and stiffen the chassis.
Project 4: The Ferry (Doesn’t Float – but It Transports)
A “ferry” is a hit for role play and trains “building something that can carry a load”.
- Difficulty: easy
- Time: 10–15 minutes
- You’ll need: wide platform, low side walls, ramp/foldable bridge (optional)
- Platform: build a wide, flat surface (better wider than longer).
- Side walls: low borders on the left and right so the “cargo” doesn’t tumble off.
- Ramp: build a sloping ramp at the front – if necessary, one long piece works as a “plank”.
- Test the cargo: drive two small cars or building blocks up and down.
- If-then troubleshooting: If the ramp slips off, secure it with two connectors or build it flatter.
- If-then troubleshooting: If the platform sags, add two “side beams” underneath.
Project 5: The Marble Run Loop (No High Tech, Lots of Wow)
A mini marble run shows children cause and effect – and gets you plenty of “Again!”.
- Difficulty: medium
- Time: 20–30 minutes
- You’ll need: inclined plane/rails, 2–3 supports, curve/loop (depending on the system), marble/ball
- Start ramp: build a sloping track with two supports (higher at the top, lower at the bottom).
- Curve/loop: add a curve or a small loop if your system allows it.
- Run-out: build a “catch zone” at the bottom (small basket or border).
- Fine-tuning: change the angle slightly until the ball runs smoothly.
- If-then troubleshooting: If the ball stops, make the ramp steeper or reduce friction (smoother pieces).
- If-then troubleshooting: If it flies out of the curve, support the curve or add a side border.
Avoiding Frustration (Without Taking Over Everything)
The best way to help is with questions – not with “I’ll just do it quickly”. Sure, you could just press the axle straight. But then the success belongs to you. And you want your child to feel like building again tomorrow.
- “Show me” instead of “Give it here”: let them explain what’s stuck right now.
- One problem at a time: axle first, then wheels, then body.
- Mini goals: “Just this one connection, then a break.”
- Make rebuilding normal: “That was the prototype.” Sounds like a workshop, not like failure.
From experience: When we test whether a building project is “everyday-friendly”, we look at two things above all: Does it survive a round of play – and is it quick to fix after a mistake? That’s often exactly where it’s decided whether kids stick with it or close the box.
Why We at Bieco Think This Way About Building
We design building ideas so they work in everyday family life – not just at the perfect craft table. We are a family business from Hamburg, relaxed in true northern German style, and we’ve been doing this for 66 years. That’s why, when it comes to materials, workmanship and warnings, we prefer to be clear and honest rather than kid you. And yes: Ulli & Flo write as parents for parents – with an eye for the fact that there’s often pasta cooking on the side.
Storage & Tidiness: So the Box Doesn’t Become a Bone of Contention
Good storage is half the battle – the other half is a small ritual. If pieces keep going missing, nobody enjoys building. If everything is easy to find again, your child is also more likely to start on their own.
- Box with a lid: ideally stored up high if younger children are in the house.
- Connectors separately: a small tin just for connectors/screws saves search time.
- Photo ritual: “Photograph the build, then take it apart” helps with letting go.
Keep Browsing: Matching Ideas at Bieco
If your child is in the middle of a building craze, you’ll quickly find matching inspiration in our hub. Feel free to drop by Toys for Ages 5+. If you’re looking for more general guidance, these guides are handy too: The Best Toys for Ages 5+: A Guide for Parents and Educational Value: Learning Toys for Children Aged 5+.
FAQ
Which building toys make sense for ages 5+?
A set with stable connections that quickly delivers a sense of achievement makes sense. Good features are clearly laid-out pieces, clear building ideas (vehicle, bridge, crane) and plenty of room for rebuilding. Pay attention to the age recommendation and warnings – especially if younger siblings live in the household.
How long should building projects for 5-year-olds take?
Usually 10–20 minutes per building stage is ideal. Many children build for longer when it happens in rounds: plan briefly, build, test, take a break, continue. A timer helps before the mood tips. And if only the base is standing today: the rest comes tomorrow – no stress.
How can I tell whether toys are safe for building?
Look for CE, warnings, age recommendation and complete manufacturer details. According to the Bavarian Consumer Portal, CE is mandatory for toys in the EU; however, it is not an independent test seal. For everyday life, that means: suitable piece size, clean workmanship and everything back in the box after playtime.
What should I do if my child gets frustrated quickly while building?
Make the task smaller and help with questions instead of taking over. Start with just a few pieces, set mini goals and plan breaks. Phrases like “Where could another support go?” work better than “I’ll do it”. Rebuilding isn’t failing – with building sets, that’s often the real learning moment.
Sources: Bavarian Consumer Portal – Toys: Legal Requirements; Federal Ministry for the Environment – Safe Toys; Consumer Advice Center – Choosing Toys Safely.
In closing: If the building phase is just starting at your place, you’ll find more ideas to keep browsing in our hub Toys for Ages 5+ – from tinkering to role play.