How to Make a Hobby Horse: Tutorial, Template & Safety Tips
At a glance
- Making a hobby horse takes 60–120 minutes, with or without sewing.
- Rough stick length: up to about your child's chest height, so riding feels relaxed.
- Stuffing: add it in small portions until the head is firm and holds its shape.
- Eyes & decorations are best embroidered or made from felt, with no loose small parts.
- Secure the neck/stick joint twice (sew + wrap, or add an extra collar).

The most reliable way to make a hobby horse is with felt or sturdy fabric, stuffing and a smooth wooden stick. This is a DIY that works in real family life, even when someone is shouting “I'm huuungry!” in the background and the dog is stealing the wool. Here you'll find two methods (no-sew and with a sewing machine), a template to trace, rules of thumb for size and amount of stuffing, plus tips on reins, care and repairs. We're a family business from Hamburg and have been doing this for 66 years, and Ulli & Flo write here as parents for parents: practical, honest, with no pressure to be a perfect crafter.

Ulli & Flo
Owners of bieco · Hamburg · parents themselves
We've learned that a hobby horse doesn't have to be perfect, just sturdy enough for the next gallop around the living room. And yes, repairing counts as a crafting success in our book. Feel free to browse our Hobby Horse collection.
How can you make a hobby horse? The 2 easy ways
You have two good options: gluing (fast) or sewing (more durable). Both work. What matters is how wildly your child rides and how much you feel like handling a needle, thread or glue right now.

- Option A (no sewing): Felt or sturdy fabric that glues well. Ideal for crafting afternoons, birthday parties and “the costume party is tomorrow” moments.
- Option B (with a sewing machine): Sew the fabric pieces, turn them right side out, stuff. It often lasts longer, but needs a bit of calm and a reasonably cooperative machine.
Definition: A hobby horse is a fabric or felt head on a stick for role play. It gets ridden, led and “looked after”, which is exactly why the joints and details need to be sturdy.
What do you need for a hobby horse? (Checklist to tick off)
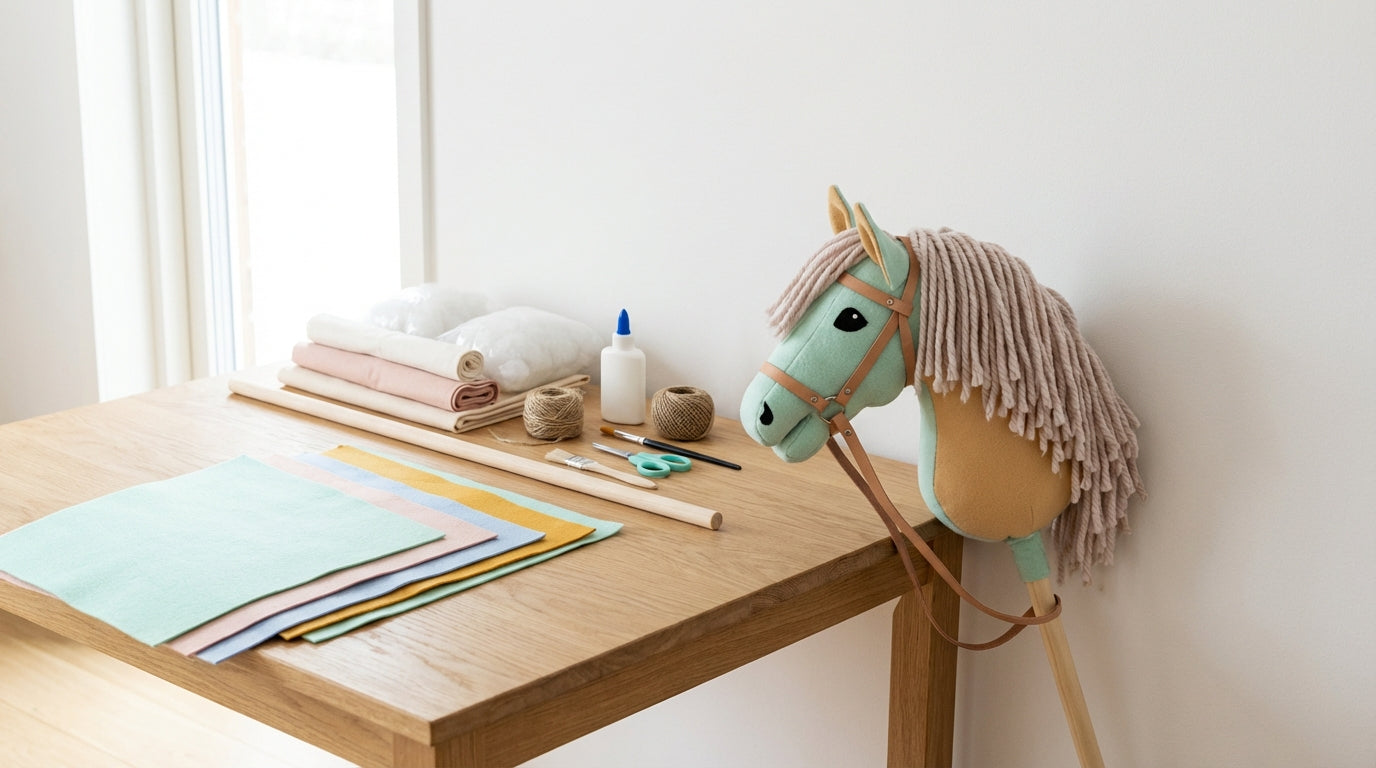
A manageable basic kit will take you very far. You don't have to empty a craft store; most of it is probably lying around somewhere between the gift ribbon and the sticky tape.
- Fabric/felt: felt or sturdy cotton fabric (canvas/drill) for the head
- Stuffing: for filling (small portions work best)
- Wooden stick: smooth, splinter-free, suited to your child's size
- Template: paper + pencil (or use our pattern below)
- Scissors: ones that won't be offended by felt
- Glue: fabric glue or hot glue (hot glue for adults only)
- Mane: wool, yarn or felt strips
- Reins/bridle: webbing, fabric ribbon or felt
For the sewn version you'll also need a sewing machine, thread and clips/pins. Optionally, a sturdier interfacing helps the head hold its shape even better.
Practical tip: Make the template from paper first and hold it up to your child (and to the stick) before cutting any fabric. It saves your nerves.
Template: How to draw the head (with measurements to copy)
A good template is half the battle, as it determines shape and stability. You can simply draw it yourself, with no artistic pressure.

How to do it (classic size): Draw a profile about 28–32 cm long (nose to back of the head) and about 22–26 cm high (chin to ear tip). At the bottom, add a “neck”: about 10–12 cm wide and 12–15 cm long.
- Ears: draw them a little larger so they still look like ears after stuffing.
- Neck opening: leave enough room at the bottom for the stick to fit in and for you to still be able to stuff.
- Seam/glue edge: allow about 1 cm seam allowance when sewing; when gluing, a sturdy edge of about 8–10 mm is enough.
If you want a “download template”: use the measurements above as a grid and draw them on squared paper. It's the everyday solution, with nothing to print.
How do I make a hobby horse? Step by step (no sewing)
The gluing method is the fastest and, for many families, the most relaxed. Perfect if you'd rather get “finished” than get “perfect”.

- Transfer the template: Draw two identical head pieces on felt/fabric and cut them out.
- Glue the edges: Glue all the way around, leaving an opening at the bottom of the neck.
- Stuff: Add stuffing in small portions, shaping the muzzle and forehead especially well.
- Insert the stick: Push the stick into the neck opening and test the position (straight, not crooked).
- Secure the neck: Wrap tightly with felt strips or fabric ribbon and glue firmly. Better too many layers than too few.
- Attach the mane: Glue felt strips or wool on in rows. For more hold: glue the mane on in “tufts” instead of as one long piece.
- Details: Glue on or embroider eyes made of felt; add nostrils with felt or a fabric marker.
Safety note: With small children, avoid buttons, beads and detachable small parts. According to the Bavarian Consumer Portal, swallowable parts are especially critical in toys for children under 3.
Can you make a hobby horse with a sewing machine?
Yes, and it usually turns out more durable if you reinforce the neck and the joints. The sewing machine is especially worthwhile if your child is more “tournament mode” than “leisurely stroll”.
- Cut out: Two head pieces (optionally plus interfacing as an insert for more shape).
- Sew together: Right sides together, sew all the way around, leaving the neck open at the bottom.
- Relieve the curves: Carefully snip the seam allowance at tight spots (not into the seam).
- Turn & stuff: First the muzzle, then the cheeks, then the back of the head, shaping as you go.
- Insert the stick: Push the stick in and check the fit (straight, not wobbly).
- Close the neck: Close by hand with a firm stitch and also sew on a “collar” (felt/fabric band around the neck, once all the way round).
- Mane & details: It's best to sew the mane on or secure it with several dots of glue; embroider the eyes or appliqué them from felt.
The most important part is the neck area, because that's where it gets pulled, rocked and “faster again!” gets shouted. If you work sturdily here, you'll have much less repair drama later.
Which fabrics, glues and colors are suitable?
Firm, low-stretch materials make the hobby horse much more durable. You want a head that holds its shape and doesn't look like a crumpled sofa cushion after three rounds.
| Material | Durability | Difficulty | Good for |
|---|---|---|---|
| Felt | medium | easy | no sewing, doesn't fray |
| Canvas/drill | high | medium | sewing, very shape-retaining |
| Fleece | medium | easy–medium | cuddly, needs good stuffing |
| Plush | medium | medium–high | looks great, can be slippery |
When it comes to glue: better a suitable product than “whatever is still lying around”. Fabric glue is made for bonding textiles; hot glue sets quickly but can come loose under strong bending, so it's best to also wrap or sew the neck joint.
When choosing materials, transparent information on ingredients and safety helps. According to the German Federal Institute for Risk Assessment (BfR), toys are assessed for health risks from chemical substances, among other things, especially items that children handle a lot.
How much stuffing for a hobby horse? (Rule of thumb + feel test)
The right amount is: enough that the head feels firm but still gives slightly. An exact weight depends heavily on head size, fabric thickness and the firmness you want, so here's a practical method instead of number games.
- Stuff in portions: Small “stuffing clouds” instead of one big lump, which prevents bumps.
- Stuff by zone: Muzzle and forehead first, then cheeks, then the back of the head. That keeps the shape “horsey”.
- Shape test: Press the forehead and muzzle: they shouldn't collapse or feel hollow.
- Stick test: Hold the stick horizontally: if the head bends sharply, there's often not enough stuffing or stability in the neck.
Rule of thumb from crafting life: better to stuff a little firmer than too soft. You can add more later, but “too soft” is annoying. If you're unsure, leave the neck opening temporarily closed and test a few “laps at a walk” in the living room.
Practical tip: A stuffing tool from the household: the handle of a wooden spoon or a chopstick helps push stuffing into the muzzle and ears.
Which size by age? Stick length, head size and grip
The best size is the one your child can hold and “ride” comfortably. You don't need centimeter-perfect precision, but a few guidelines help.
- Stick length: roughly up to your child's chest height; that way the stick bumps the ground less when walking and is easy to steer.
- Head size: rather compact for smaller children (so it doesn't get top-heavy); for bigger children it can be more “horse”.
- Grip zone: leave the stick smooth where children hold it, or wrap it with fabric ribbon (less slippery).
If several children will play with it: make the stick a bit longer and shorten it later if needed. Shortening is quick, whereas “too short” stays offended for good.
Reins & attachment: How to keep everything from wobbling (and staying on)
Reins are only nice if they don't come off after two days. The simple solution is usually the best.
- Simple reins: Lay a fabric ribbon or webbing (about 1–2 cm wide) as a loop around the neck area and sew it on firmly or glue it very securely.
- Bridle look: Attach a second band across the “nose” (felt strip) and to the sides of the head, ideally sewn on.
- Attachment without metal: If possible, work without small buckles/metal parts so nothing pinches or comes loose.
Definition: A bridle on a hobby horse is a band or felt construction that serves as reins and decoration. It has no “real” purpose as in horseback riding; it should be easy to grip and hold securely.
Avoiding mistakes: The 5 classics (and how to rescue them)
Practical tip: If something wobbles: look for the cause first (stick, neck, glue spot), and only then add “even more decoration”.
Most mishaps happen at the neck, not on the pretty horse face. Here are the classics, with no drama:
- Stick wobbles: Reinforce the neck area with an extra felt/fabric collar and wrap tightly; with the sewn version, sew the collar on.
- Glue comes loose: Clean the glue spot, re-glue and additionally secure mechanically (wrapping/sewing).
- Head is top-heavy: less decoration at the front, more stuffing at the back, or choose a slightly smaller head.
- Too little stuffing: Open it up again and add more in small portions, especially the muzzle and forehead.
- Mane frays: Attach the mane in shorter strands or secure it once at the base with a seam.
Safety & durability: What parents should look out for
A DIY hobby horse is good when it withstands play and has no loose parts. It sounds unromantic, but it's exactly what makes the difference in everyday life.
- Stick: smooth, splinter-free, no sharp edges; round off the ends if needed and wrap them well.
- Avoid small parts: Embroider the eyes or make them from felt instead of using buttons/beads.
- Secure connections twice: The neck area is the “weak point”, so it's better to sew + wrap or add an extra collar.
- Orientation to rules: The EU Toy Safety Directive 2009/48/EC sets out basic safety requirements; the German Federal Ministry for the Environment provides information on this (including its implementation in Germany).
- Standards as guidance: You can also find information on the Toy Safety Directive and the standards environment at DIN.
And honestly: tightening, re-gluing and re-sewing are part of it, just like with a bicycle basket. We've been doing this for 66 years and know that toys live. And sometimes, after a particularly wild gallop, a small repair is simply needed.
Care & repair: How to help your hobby horse last longer
A hobby horse doesn't have to look spotless, but it should stay sturdy. A few simple steps can noticeably extend its life.
- Cleaning: Spot-clean surfaces with a slightly damp cloth; for sewn heads, gently hand wash if the fabric and workmanship allow it.
- Refresh the mane: Trim felt strips, untangle wool, reattach loose strands.
- Repair a seam/glue spot: Close it first (sew/glue), then secure it additionally (collar/wrapping).
- Check the stick: Check regularly for splinters; if the stick gets rough, it's better to replace it than to think “it'll be fine”.
If children love the horse, it gets used, and that's the plan. Small repairs aren't a failure but a sign of a very successful toy.
Time & cost: What you can realistically plan for
For a hobby horse you usually need 60–120 minutes, depending on how much you love detail. Without sewing it's often quicker; with sewing it gets sturdier.
- Without sewing: approx. 60–90 minutes (including template, stuffing, mane)
- With a sewing machine: approx. 90–120 minutes (including reinforcing and a clean neck)
- Cost: varies a lot, depending on whether you use fabric scraps or buy everything new.
If you want to upcycle: an old thick sock or a leftover piece of sweater can work as the fabric base. What matters is that nothing frays and the connection to the stick stays sturdy.
FAQ
How long should the stick of a hobby horse be?
The most practical stick reaches roughly up to your child's chest height. That way they can walk comfortably without the stick constantly touching the ground. If several children will play with it, go a bit longer and shorten later, since too short is hard to fix.
Can a no-sew hobby horse really be made durable?
Yes, if you build the neck area especially sturdy and secure it twice. Glue alone doesn't always hold forever during wild play, so an additional felt or fabric collar wrapped tightly around the neck helps. It's best to keep eyes and decorations flat (felt/embroidery).
Which glues are suitable for a felt hobby horse?
Fabric glue is made for bonding textiles and is usually the first choice. Hot glue sets quickly, but should only be used by adults and can give way under strong bending. For heavily stressed spots (neck), “glue + wrap” is much more reliable than glue alone.
How do I attach the head to the stick so it doesn't wobble?
The trick is a tight neck plus an additional collar as a safeguard. Insert the stick deep enough, stuff the neck area firmly and close the opening tightly. Then wrap a felt or fabric strip snugly around the neck as a collar and sew it on or glue it very securely.
How do I prevent swallowable small parts on a hobby horse?
For eyes and decorations, it's best to use embroidery or flat felt pieces. Buttons, beads and loose appliqués can come off. The Bavarian Consumer Portal explains notes on swallowable parts and testing principles in an easy-to-understand way.
Roughly how much stuffing do you need for a hobby horse?
There's no fixed weight: stuff until the head is firm and holds its shape. Work in small portions and shape the muzzle and forehead first. If the head bends at the stick or feels “hollow”, there's usually not enough stuffing or stability in the neck. Just add more and test again.
Conclusion: DIY with calm (and a sturdy neck seam)
A good hobby horse isn't the most perfect one, but the one that gallops safely through the living room. If you like, take a shortcut and have a look at our ready-made models: Hobby Horses. And if you realize while crafting, “not today”, that's perfectly fine too.