DIY Play Shop: How to Build a Play Shop – Guide, Safety & Ideas
At a glance
- A DIY play shop comes together fastest with a crate and a counter board.
- Test the dimensions on your child: hand height = a good counter height.
- Before the first round of play: edges rounded, nothing wobbling, nothing coming loose.
- Finish: choose one that is suitable for indoor use and as low-emission as possible.
- Fun extras: chalkboard, curtain, shelves, cash register – all of it can be added later.

The easiest way to build a play shop yourself is with a sturdy wooden crate and a counter board. In this guide you'll find two build options (quick & simple, and one with a back panel/shelf), a clear materials list, safety checks and ideas for playing afterwards. Everything is designed to fit into real family life: better solidly screwed together than “perfect someday”. And if someone shouts “Muuuuum!” in the middle of it all – that's not a work stoppage, that's the soundtrack.

Ulli & Flo
Owners of bieco · Hamburg · parents themselves
Building our own taught us: sturdy and smooth first, pretty second. If the play shop survives everyday life, it automatically becomes a favourite spot. Feel free to browse our Play Shop collection.
Which dimensions make sense for a play shop?
The most sensible dimensions are the ones that suit your child's size and play height. Instead of getting hung up on rigid numbers, keep it practical: stand your child in front of a surface (table, chest of drawers) and see where their hands rest comfortably. That's usually a good counter height. The depth should leave room for goods at the front, without everything “disappearing” toward the back.

A play shop is a role-play piece of furniture that makes everyday situations playable. In practical terms: if reaching and putting things down is comfortable, your child stays in the game longer – and you're more likely to drink your coffee while it's still warm (or at least lukewarm).
Practical tip: Mark the planned counter height on the wall with masking tape and play “test shopping” for 2 minutes. It saves you rebuilding frustration later.
Materials list: what you really need (and what's optional)
For a sturdy DIY play shop, wood, suitable screws and thorough sanding are enough. You can upcycle a lot, as long as it's stable and doesn't turn into a splinter party. If you have the wood cut to size at the hardware store, it gets even easier.

Materials (basics)
- Sturdy wooden crate as the body (e.g. toy chest/fruit crate, as long as it's really solid)
- 1–2 boards for the counter and, if needed, the back panel
- Screws to suit the thickness of the wood (better a bit sturdier than too delicate)
- Sandpaper coarse + fine (or a sanding block)
- Wood glue optional (helps with joints, but doesn't replace screws)
Materials (optional, but often worth their weight in gold)
- Metal brackets for extra stability at the counter/back panel
- Wooden dowels (if you like to build a bit more elegantly, but not a must)
- Felt glides under the crate (to protect parquet floors and your nerves)
- Chalkboard film or a thin board for “special offers” and scribbles
- Fabric for a curtain (hides chaos very reliably)
Tools (minimum)
- Cordless screwdriver (or a screwdriver with patience and good humour)
- Saw (hand saw/jigsaw) or have the wood cut at the hardware store
- Tape measure + pencil
- File or sanding block for edges
DIY play shop instructions (step by step): Option 1 “Crate + counter”
The crate option is the quickest solution with the best feeling of stability for the price. You build a counter on top of a crate – done. This is the version that still works when your child has decided to play “construction worker” today and give everything a really good test.
Step by step
- Check the crate: Is anything wobbly, are boards loose or nails visible? Repair first, prettify afterwards.
- Sand everything: Round off the edges inside and out, smooth any rough spots. Take your time – later it's the difference between “works” and “ouch”.
- Plan the counter board: Choose a width that leaves a small shelf at the front. Too much overhang, however, is an invitation to hang on it.
- Attach the board: Screw into the board from inside/below through the crate. Optionally reinforce with brackets if the crate is rather “lightly built”.
- Inner compartment (optional): An intermediate shelf creates a “storeroom” and keeps things tidy. It doesn't need to be accurate to the millimetre – children sort by their own logic later anyway.
- Check stability: Put it on the floor, lean on it lightly, give it a shake. If it tips: widen the base or position it differently.
Sturdy isn't “overdoing it”, sturdy is simply made for everyday life. Two extra screws are often less work than tightening things every week later on.
Option 2: Shelf play shop with back panel & compartments
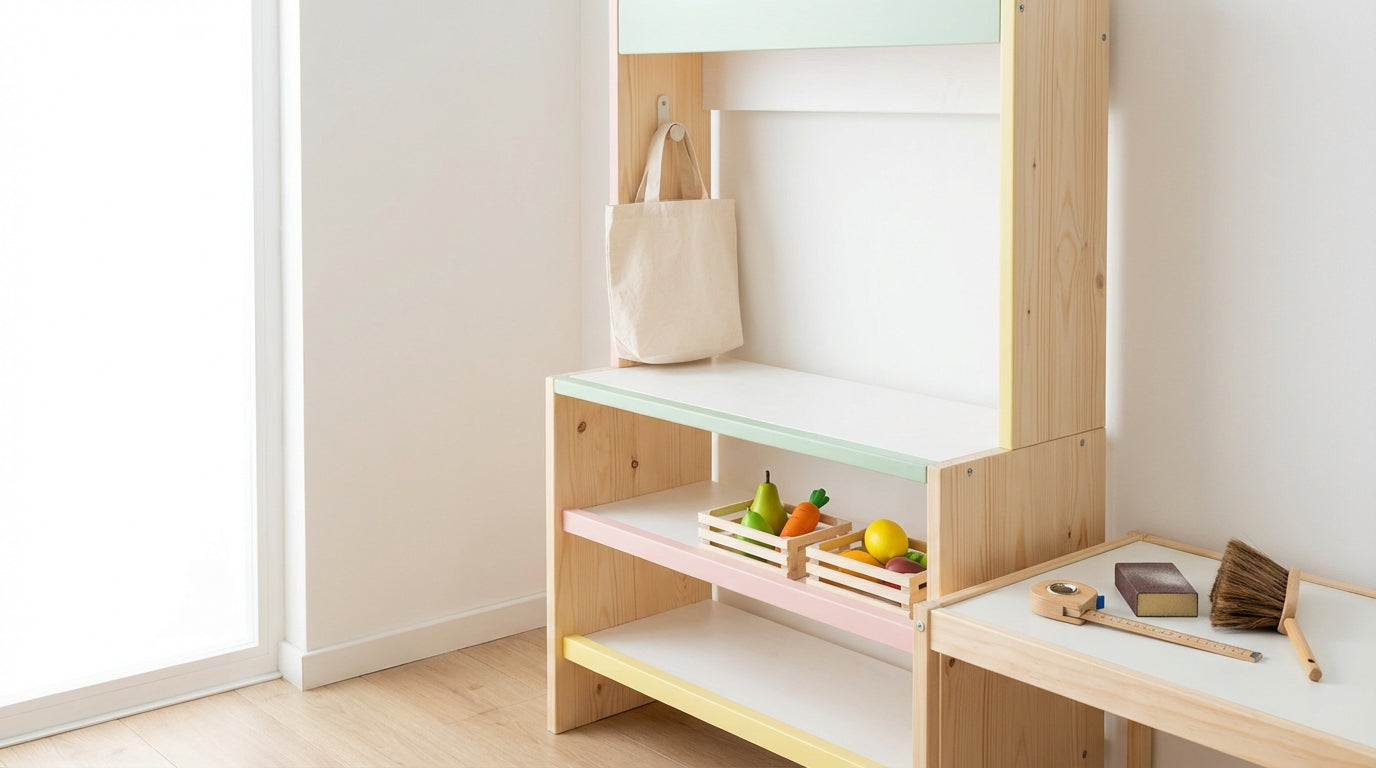
With a back panel and small shelves, the play shop instantly looks “like a real shop”. It also leaves more play space on the counter, because goods can move back onto the shelf. And yes: at some point the shelf will also become a “vet's cupboard” or a “post office” – that's what happens with good toys.
Step by step
- Cut the back panel to size: A board that stands at the back of the crate (or is attached directly behind the counter).
- Attach the back panel: With screws and brackets if needed. Make sure no screw tips poke through.
- Plan the shelves: 1–3 small boards are enough. Better fewer but sturdy – too many mini compartments are often just decoration.
- Mount the shelves: Screw them in or use brackets. Then again: shake, check, tighten.
- Optional “shop window”: A strip as a frame at the front looks nice, but is really just the cherry on top.
Safety note: A DIY play shop is not a toy tested to EN 71. So build especially conservatively: sturdy, with no sharp edges and no detachable small parts.
A “DIY piece of furniture” becomes safer when you treat it like a climbing frame. That means: everything has to hold even when someone leans on it, pulls themselves up on it or uses the cash register as a “steering wheel”.
Material alternatives: fruit crate, IKEA hack, pallet wood – what really works?
Upcycling works well when the material is stable, low in splinters and cleanly finished. You don't have to buy new – but you should look critically. Especially with wood that has “already had a life”, it's worth taking a closer look at cracks, nails and splinters.
- Fruit crate/wine crate: Handy as a body, but often thin and not built to bear weight. In that case, definitely reinforce it (e.g. with an additional board inside) and sand very thoroughly.
- Shelf as a base: A small, low shelf can almost be a play shop already: counter board on top, done. Watch out for tip-over safety, especially when children lean on it.
- Pallet wood: Can work, but is often rough, splintery and has nails/staples in it. If you use pallet wood, only do so after carefully removing all metal parts and sanding very thoroughly.
“Low in splinters” means: the surface stays smooth even with friction. That matters in a children's room because hands are constantly sliding over it – and because nobody feels like spending an evening with tweezers.
Finishes & paints: what's a good choice for a children's room?
Choose coatings that are suitable for indoor use and as low-emission as possible. The play shop often stands where children play, cuddle and breathe – so it's fine to be a little picky. Also let new finishes air out well before the shop moves into the children's room.
The “Blue Angel” (Blauer Engel) is an eco-label for products with stricter requirements. According to the German Environment Agency, wooden toys with the Blue Angel must, among other things, be free of synthetic fragrances and certain flame retardants and wood preservatives (German Environment Agency (Umweltbundesamt)).
Low-emission paints are labelled so that they meet strict criteria. The Blue Angel states that low-pollutant paints are awarded the label, among other things, on the basis of a formulation assessment or emissions testing (Blauer Engel).
Putting safety into context with DIN EN 71-1: edges, small parts, tip-over protection
EN 71-1 is a toy standard covering mechanical and physical properties. That doesn't automatically make your home-built play shop “compliant” – but you can follow its basic ideas: no swallowable small parts, no sharp edges, sturdy construction.

A small-parts cylinder is a test gauge used to classify small parts as swallowable. According to the Verbraucherportal Bayern (Bavarian consumer portal), parts count as swallowable if they fit into a test cylinder with Ø 31.7 mm (Verbraucherportal Bayern).
Authorities explain the test as assessing small parts with a test cylinder. LAVES Niedersachsen (Lower Saxony state office for consumer protection) describes that swallowability is checked with a test cylinder and that EN 71-1 covers the mechanical/physical properties (LAVES Niedersachsen).
- Edges & corners: Round everything off until it feels “soft” – especially on the counter, handle edges and shelves.
- Small parts: No detachable buttons, mini hooks, small magnets or decoration that can come loose (especially for under-3s).
- Tip-over safety: If the shop is tall or narrow, it gets wobbly. Then it's better to build it wider or place it so that leaning on it doesn't make it topple.
- Screw check: Countersink the screw heads or set them so that nothing scratches. Tighten them regularly.
Practical tip: Do a “week test”: set the shop up for 7 days, play normally – and then tighten all the screws once more. Wood likes to move.
Cost & time: what you can realistically expect
It's cheapest when you already have the crate and boards and only need screws and sandpaper. If you buy materials new, it depends heavily on the type of wood, the cutting and the finish. Better to allow a small buffer – something is always missing in the end (usually exactly the screws you “definitely still had”).
- Time: The crate option can often be done in 1–2 hours, the shelf option more like 2–4 hours – plus drying/airing time if you paint or oil it.
- Cost: From “almost free” (upcycling) to “everything from the hardware store” (wood, brackets, finish). The biggest lever is: use material you already have and plan your cuts.
Sanding takes time, but saves tears and plasters later. It's one of those pieces of parenting wisdom you only believe once you've ignored it.
Checklist before the first round of play (short, but important)
Before the first round of play, the play shop should stand firmly and have no risky spots. Run a calm hand over it once – like with a bicycle helmet: better to check once too often than once too little.
- Shake test: Does the counter wobble? Does the back panel move? If so, tighten or reinforce.
- Edge check: Run your palm over all the edges – if it “catches” anywhere, sand again.
- Screws: Are all screws seated firmly, and are no tips or burrs noticeable?
- Small parts: Is there really nothing on it that could come loose and be swallowed?
- Stability: Does it rock on your floor? Then adjust the felt glides or widen the base.
Accessories & play ideas: how to keep the play shop exciting for a long time
Children play longest when there are “goods”, a cash register and small tasks. Kids love recurring routines: shopping, paying, packing, delivering. And you can even bring a little order into the game on the side (very carefully dosed).
- Product range: Fruit, vegetables, bread, milk – ideally in sizes that are easy to grip.
- Cash register: Play money, cards, a “scanner” (if need be, an old calculator without batteries).
- Packing: Cloth bags, small baskets, paper bags.
- Tasks: “Today is market day – make a special offer”, “We need three things for breakfast”, “Delivery service: take it to the next children's room”.
Play ideas work best when they connect to your everyday life. A “shopping list” can also simply mean: two apples and a loaf of bread for the cuddly toy – mission accomplished.
If you're looking for accessories that fit straight into role play, you'll find inspiration in the bieco play shop range. Feel free to take a look here: Play Shop.
Why this topic matters to us (short, northern German style)
We've been making and testing children's products for 66 years – you automatically become careful. Bieco is a family business from Hamburg, and Ulli & Flo write as parents for parents: better to say honestly what DIY can do (and what it can't) than to pretend every screw is automatically “safe”. If you sand once more and tighten once more while building, you're usually on the right side.
FAQ
How long does a DIY play shop really take?
The crate option can often be built in 1–2 hours, plus drying time for the finish. For the shelf option with a back panel and compartments, plan for more like 2–4 hours. Sanding almost always eats up the most time – but that's exactly what makes the shop pleasant and ready for everyday use later.
Which wood is suitable if I want to build a play shop myself?
Good wood is wood that is stable and can be sanded cleanly. Many people use edge-glued panels or sturdy solid-wood crates. What matters less is a “fancy type of wood” and more a smooth, splinter-free surface and a construction that doesn't wobble when children lean on it while playing.
What is a small-parts cylinder and how does it help when crafting?
A small-parts cylinder is a test gauge for assessing swallowable small parts. According to the Verbraucherportal Bayern, parts count as swallowable if they fit into a test cylinder with Ø 31.7 mm. This helps you above all with decoration, hooks, buttons or accessories that could come loose.
Can I build a DIY play shop for children under 3?
Yes, but then you should be especially strict about small parts, edges and stability. Avoid anything that can come loose and fit into a mouth, round off edges thoroughly and check the screws regularly. Follow the basic ideas of toy safety (e.g. small-parts testing), even though DIY isn't tested.
Which paint or varnish makes the most sense for a children's room?
Choose products that are suitable for indoor use and as low-emission as possible. The Blue Angel can offer guidance: the German Environment Agency describes requirements for wooden toys with the Blue Angel, for example regarding certain fragrances, flame retardants and wood preservatives. Also let new finishes air out well before anyone plays.
How do I make the play shop sturdy without a professional workshop?
Stability comes from clean screwing, reinforcement in the right places and tip-over safety. Use suitable screws, add metal brackets where needed and do the shake test. If the shop tips when someone leans on it, a wider base or a spot where nobody pulls on it from the side often helps.
If you'd rather have a ready-made solution after all, you'll find play shops and matching ideas with us. Feel free to pop into the play shop section – and if you want to dive deeper: From what age does a play shop make sense? Development & tips and The most popular play shops for children compared – models & accessories.