DIY Pacifier Clip: Instructions, Materials & Safe Length
At a glance
- Making a pacifier clip yourself is safer when you keep it simple.
- As a guideline, without the clip: a maximum length of 22 cm (220 mm).
- Never extend it, and skip cords or loop gimmicks: they create a tangling risk.
- Before every use: a quick pull test and visual check (clip, loop, ribbon).
- If you have any doubts, it's better to use a tested pacifier clip.

Making a pacifier clip yourself means: short, sturdy and easy to check. Here you'll find simple DIY instructions, a materials checklist and the most important length limits, so the result stays practical in everyday life – and doesn't end up “pretty, but a bit scary.”

Ulli & Flo
Owners of bieco · Hamburg · parents themselves
We've learned that with a pacifier clip, “simple” is often the best safety idea. A quick check before clipping it on saves a lot of worrying later. Feel free to browse our pacifier clip collection.
In the end, you should feel good about it – not have one more project on your plate. I'm deliberately keeping this practical, the way you'd explain it at the kitchen table: with a measuring tape, common sense and the knowledge that babies can pull surprisingly hard.
And yes: you can do this between the lunch box and the laundry basket. Just please not in “it'll be fine” mode – this topic is too close to your child for that.
What is a pacifier clip – and what is it for?
A pacifier clip attaches the pacifier to clothing, not to the child. The purpose is simple: the pacifier falls on the floor less often, and you don't have to fish under the sofa every five minutes.

Definition: A pacifier clip (pacifier holder) is a strap with a clip. It connects the pacifier (usually via its ring) to the clothing so that it stays within reach.
Definition: EN 12586 is a European standard for pacifier holders. It describes safety requirements and test methods, for example regarding maximum length and warning notices.
How can I make a pacifier clip myself?
The easiest option is a straight ribbon with a clip and a small pacifier loop. The fewer parts, the easier it is to keep the clip short, sturdy and quick to check.
If you only take away one thing: “Simple is safer.” Decoration is nice, but everything extra is also an extra spot that can come loose, break or fray.
What length is safe – and how do you measure correctly?
As a clear guideline: without the clip, a maximum of 22 cm (220 mm). This length limit is described in the standard; according to DIN Media, the standard limits the length in order to reduce strangulation risks (DIN Media: DIN EN 12586).

Important: don't measure it “dangling loosely,” but realistically. In everyday life, the clip rarely hangs neatly straight – it gets pulled, twisted, caught somewhere. So measure it once the way your child would “stretch” it: slightly taut.
Practical tip: Lay the finished clip flat, hold the clip end firmly and pull the pacifier end taut once – then measure. That's closer to real life than “nicely arranged.”
Loops are a topic of their own: they can make tangling more likely. If your design forms a larger loop anywhere (e.g. a doubled-over ribbon), keep it especially simple and short – and if you don't need a loop, it's better to leave it out.
Materials: what you really need (and what you're better off skipping)
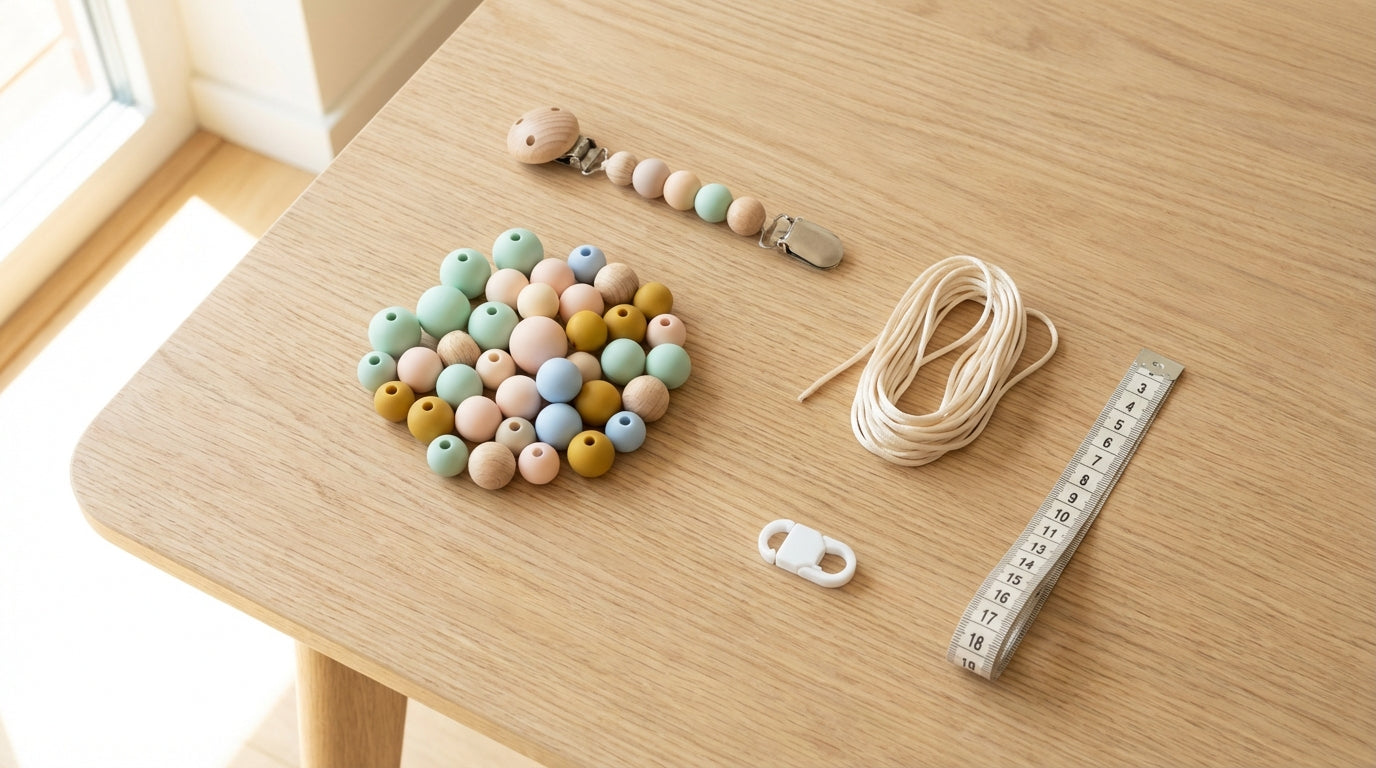
At its core, you only need a clip, ribbon and a pacifier loop. That gets you a sturdy solution that's easy to check.

- A suitable clothing clip (intended for pacifier holders, with no sharp edges)
- A sturdy ribbon (woven, tear-resistant, ideally with minimal fraying)
- A short loop for the pacifier ring (a piece of ribbon or a ready-made loop)
- Needle & thread (if you're sewing) or a secure method of attachment according to the clip's instructions
- Scissors & measuring tape (sounds trivial, but saves your nerves)
Safety note: No extensions, no additional cords, no strings. Attach the clip to clothing only – not to straps, ribbons or shoelaces.
Wooden beads & decoration: possible, but only if you can truly do it safely. The more individual parts, the more potential weak points. If you have no experience with child-safe connections, stick with “plain ribbon” – that's the relaxed option.
With ready-made parts, transparency helps: what is it made of, and what is it intended for? At Bieco, we're the “ask one more time” type: a family business from Hamburg, working in baby products and toys for 66 years – and for us, safety isn't a decorative topic, it's everyday life.
Step-by-step instructions: making a pacifier clip yourself
The order is always the same: plan, attach, secure, check. Take 10–15 minutes and do it properly once rather than asking “Why is this loose again?” three times later.
- Decide on the length: Plan the finished length so that you end up at a maximum of 22 cm (without the clip). Remember: knots and loops change the length.
- Cut the ribbon: Cut it slightly shorter than your target measurement, because attachments often “cost” length or – depending on how they're made – can add length without you noticing.
- Form the pacifier loop: At one end, make a small loop that the pacifier ring fits through. As small as possible, as big as necessary.
- Attach the clip: At the other end, attach the clip according to the manufacturer's instructions (often by threading it through and sewing it in place). If you tie a knot: make sure nothing can come loose.
- Secure the ends: Make sure nothing frays. Loose threads are small “starting points” for bigger problems.
- Check: Pull firmly several times, twist, bend. If anything moves: back to square one.
Practical tip: Don't be gentle with the pull test. If you think “wow, that was a hard pull,” you're about where a baby ends up in the heat of the moment.
Everyday checks: how to keep your DIY clip in the safe zone
A pacifier clip is an item in daily use – it needs to be checked regularly. Babies drool, chew, pull, throw. That's no drama, but it does mean: the material works hard.

- Before every use: Give the clip and loop a quick tug and look it over all the way around.
- After washing or getting wet: Check again (the ribbon can become softer, seams can give way).
- At the first signs of damage: Discard it immediately (fraying ribbon, loose seams, tears, bent clip parts).
- Attach to clothing only: Not to straps, strings, loose ribbons or jacket drawcords.
- Not during sleep: In bed, in the cradle or in the playpen, it's better to go without the clip.
If you hesitate for a moment during the check, that's already your answer. Then it's better to make a new one or switch to a tested option – parents have enough decisions to make every day.
Typical DIY mistakes (that really happen all the time)
The classics are: too long, too fancy, attached too “creatively.” This doesn't happen because someone is careless, but because pretty quickly becomes longer than safe.
- Clip too long: “So my child can reach it better” – sounds logical, but it's exactly the point you want to avoid.
- Extension added: Please don't. If it seems too short, the design is usually the problem, not the length.
- Lots of small parts: More parts = more connections = more possible weak points.
- Glue instead of a proper attachment: Glue can come loose, especially with moisture and saliva.
- Fraying ribbons: They look harmless at first and then suddenly there's “more and more” of it.
My favorite real-life mistake: “I'll finish it properly later.” Spoiler: later rarely comes. If you're doing it, do it right away so that you can still use it with a clear conscience tomorrow.
Cleaning & care: what makes sense, without the fuss?
Cleaning means: gentle, thorough and then check again. If a DIY clip gets wet, dry it completely and then check the seams, knots and ribbon.
Wood and metal don't like long soaks in water. If you use wooden or metal parts, follow the care instructions for the respective materials and avoid soaking them for long.
A clear routine helps in everyday life. Wipe it down briefly, let it dry, do a visual check – done. If you make it complicated, in the end nobody will do it. (And then it gets really unappetizing.)
Why we at Bieco are so careful about this topic
With baby products, safety isn't a “nice to have,” it's the basic requirement. We're a family business from Hamburg, we've been doing this for 66 years – and Ulli & Flo write as parents for parents: better to check once more than to hope once too often.
With ready-made products, testing, standards and material information help you put things in context. DIY can work, but “tested” is the more relaxed choice for many families, especially if it's a gift or you're not completely sure about the material and attachment.
If you'd like to look at tested options, start with this overview. Pacifier clips
FAQ
Which materials are suitable for a homemade pacifier clip?
The most suitable are sturdy ribbons that barely fray and a clip designed for this purpose. Choose materials that are easy to clean and don't form sharp edges. The simpler the combination, the easier it is to check. If you're not sure about a particular part, it's better to leave it out.
Can I use wooden beads for a pacifier clip?
Wooden beads only make sense if they are securely attached and easy to check. Every additional bead is an additional connection that can come loose. If you have no experience with child-safe connections, it's better to stick with a ribbon-only design. That's often the safer, less stressful solution.
Making a pacifier clip yourself: how long can it be?
As a guideline: without the clip, a maximum of 22 cm (220 mm). The EN 12586 standard describes length limits; according to DIN Media, the length is limited in order to reduce strangulation risks (DIN Media: DIN EN 12586). It's best to measure under light tension, not “lying loosely.”
Can I extend a pacifier clip if it seems too short?
No, extending it is not a good idea. A longer clip increases the risk of something getting tangled in an unfortunate way. If it seems “too short,” it's often because it's attached in the wrong place or the design takes too many detours. Better: simplify instead of extending.
How do I clean a homemade pacifier clip properly?
Clean gently, let it dry completely and then check it. Depending on the material, wipe the clip with a clean, slightly damp cloth and let it dry fully. Then do a pull and visual check: seams firm, ribbon okay, clip in good shape? If anything gives way, discard it.
How can I tell that my DIY pacifier clip is no longer safe?
If anything gets loose, frays or shows cracks, it's time to stop using it. Do a mini check before every use: give it a quick pull, twist, and look. As soon as you see material fatigue or feel movement when pulling, it's better to throw it away and make a new one. That takes less time than the worrying afterward.
Finally: keep it short, build it simple, check it regularly. Then DIY can work well in everyday life. And if you'd rather play it safe: in our pacifier clip overview you'll find tested options that give you peace of mind.