Personalized Height Chart: DIY Guide with Name, Date & Scale
At a glance
- The safest way to personalize a height chart: tape off the scale first, then add the name & motifs.
- For a growth chart, three things matter: measure correctly, mount it straight, and settle on the zero point.
- Acrylic markers and paint pens hold up well – let them dry fully and seal them if you like.
- Design ideas: name, birth details, small symbols – calm beats crowded.
- Care: wipe with a damp cloth, don’t scrub – that keeps the lettering looking nice for longer.

The best way to personalize a height chart is to protect the scale first and then add the name, date and motifs. You don’t need an art degree – think of it as a little after-work project with a big payoff. In this guide you’ll get a clear order of steps, material tips, ideas (without going overboard on decor) and the most important points on mounting, sealing and care. And if someone shouts “Mooom!” in the middle of it all: no problem, we’ve planned it so you can take a break at any point.

Ulli & Flo
Owners of bieco · Hamburg · parents themselves
We’ve learned that when the scale stays clean and everything dries properly, the result looks really lovely. And a few wobbly curves in the lettering? They’re part of your family story. Feel free to browse our height chart collection.
A personalized height chart: what does it mean – and what’s in it for you?
A personalized height chart is a height chart with a name, dates and details that fit your child. Typical choices are a name, a birth date, a small symbol or a short saying – so “practical” quietly turns into a keepsake that doesn’t get tossed out at the next move.
A growth chart is a centimeter scale that lets you record your child’s height in a way that stays comparable over the years. Comparable means the same zero point, the same mounting height and the same way of measuring – otherwise it may be creative, but it’s no longer accurate.
Sealing means a clear layer protects the lettering and color from wear. This is especially worthwhile if little hands like to swipe over it “just for a second” or the dust cloth comes by regularly.
Which height chart is suitable for personalizing?
Smooth, clean surfaces with an easy-to-read scale are the most relaxed to work with. Wood is popular because it feels warm, and small slips look more “handmade” than “oh no.” The surface matters most: very rough wood makes pens fray, while a very glossy finish can make paint stick less well.
A height chart whose scale doesn’t have to start right at the floor is handy. Some models are designed to be mounted with a gap (think baseboards) – in that case the zero point isn’t “floor = 0” but is specified by the manufacturer. If you’d like to look at different options, the height charts overview gives you a good feel for shapes, scale ranges and designs.
Why a Bieco height chart as a base (without the sales fluff)?
You can recognize a good base by how well the scale, surface and mounting idea fit together. We’re a family business from Hamburg and have been doing this for 66 years – you learn that in a nursery, what wins isn’t what’s “prettiest in photos,” but what stays calm in everyday life.
Transparency is part of it: care instructions and material information should be clearly stated. On Bieco product pages you’ll usually find specific care instructions; for many wooden surfaces, for example, it says “clean with a damp cloth and mild soap” (see the care instructions on the respective product page, e.g. Bear height chart).
Materials list: what you really need (and what’s nice to have)
With a few basics you can personalize a height chart without craft chaos. This is enough for most projects:

- Soft cloth + mild soap (for cleaning)
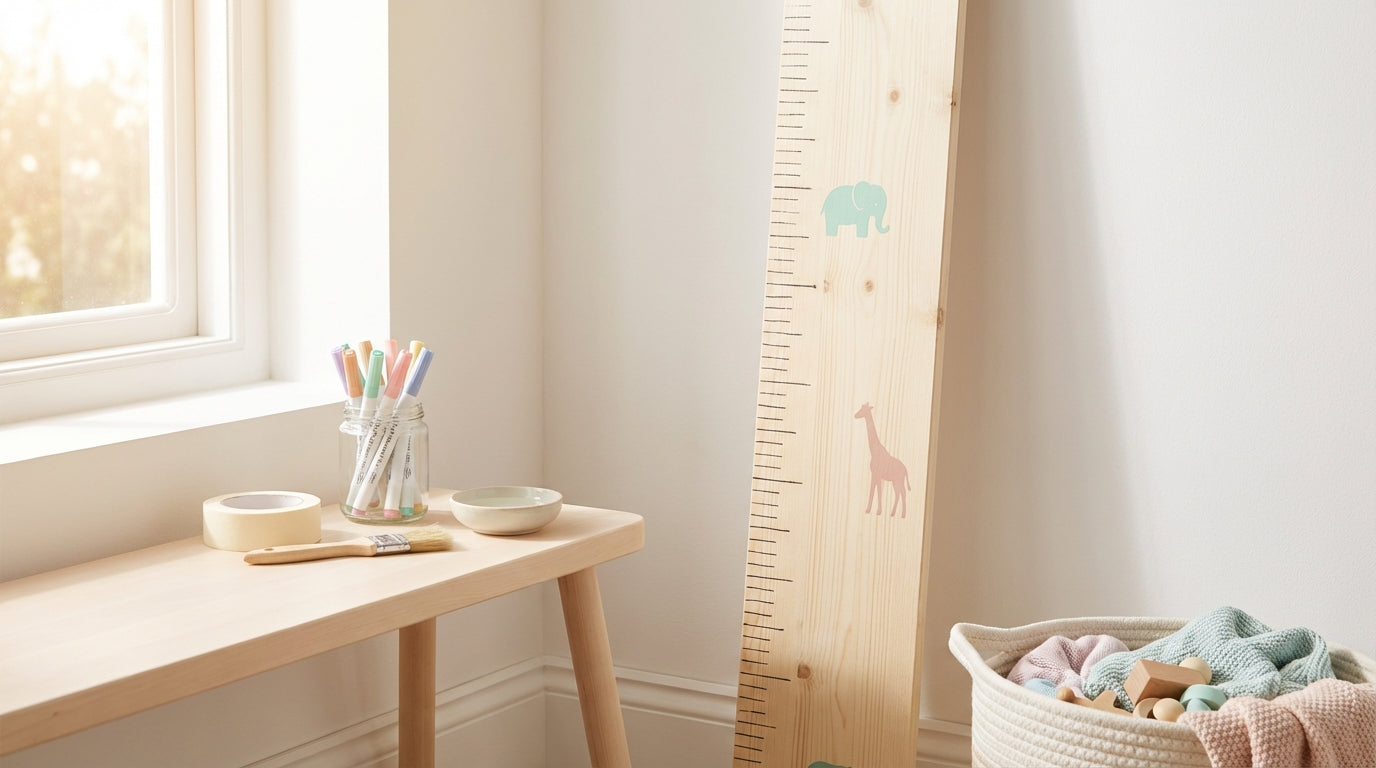
- Painter’s tape or washi tape (for taping off the scale)
- Pencil + eraser (for the pre-sketch)
- Ruler or tape measure (for spacing and checking)
- Acrylic marker or paint pen (for lettering & motifs)
- Optional: stencils (letters, stars, animals)
- Optional: clear varnish/sealant (transparent, suited to the surface)
Practical tip: Write the name once on paper at full size. If it already looks “crooked but cute” there, it won’t get any straighter on wood.
Step by step: personalizing a height chart with a name & birth details
The order is simple: clean, tape off, plan the layout, write, dry, protect. Here’s how to go about it without upsetting the scale:
- Clean & dry: Wipe with a damp cloth and mild soap, then let it dry completely. That’s not “overkill,” that’s adhesion.
- Tape off the scale: Neatly tape over the numbers and lines that need to stay clear. Leave a little margin around the scale so everything stays easy to read.
- Plan the layout: Name at the top is the classic. Birth date below or at the side. Place motifs along the edge, not in the scale.
- Pre-sketch: Sketch very lightly with a pencil. Lightly means erasable, not engraved.
- Lettering first: Name and dates first, then motifs. That way you can fit the motifs to the lettering, not the other way around.
- Let it dry: Let the marker or paint pen dry completely before you continue or tape over it. (The manufacturer’s instructions on the pen are your best friend here.)
- Seal, if you like: If the height chart will be touched often, a clear protective layer can help. Always test on an inconspicuous spot first.
- Remove the tape: Peel the tape off slowly and at an angle. If you yank, the paint sometimes comes along with it.
Mounting & measuring correctly: how to get the scale truly accurate
It only gets accurate once the zero point, height and alignment have been properly set. Take ten quiet minutes for it – they’ll save you ten “wait, that can’t be right” discussions later.
1) Settle the zero point (floor or gap?)
The most important step: check where “0 cm” is meant to be on your model. Does the scale start at the floor, or is it meant to be mounted with a gap? This is usually stated in the instructions or on the product page. If you mount a height chart with a gap, measure that gap exactly and keep it the same permanently.
2) Mark the height and align it straight
A spirit level isn’t a fussy extra, it’s half the success. Mark the planned position with a pencil, align the height chart straight and check twice before fixing it for good. Baseboards can get in the way: in that case, use spacers or pick a section of wall without a “bulge.”
3) Always measure the same way (so entries stay comparable)
Comparable means the same conditions, otherwise the centimeters are just decoration. Barefoot, back against the wall, eyes looking straight ahead. If you want to be really tidy: always measure at the same time of day (height can vary slightly between morning and evening), but that’s truly optional – this isn’t a parenting competition.
Which pens and paints last on wood – and which should you skip?
Choose products that are suitable for children’s environments and that stick to the surface. Especially when the height chart hangs in the nursery and is touched regularly, it’s worth taking a quick look at labels and notes.
The toy safety standard DIN EN 71-3 offers guidance when it comes to possible migration of harmful substances. According to the Verbraucherzentrale NRW (a German consumer advice center), it makes sense to look for compliance with DIN EN 71-3 on treated surfaces and paints for toys when children come into contact with them (Verbraucherzentrale NRW).
DIN EN 71-3 describes test requirements for the “migration of certain elements” from toy materials. DIN e. V. places this in the context of the Toy Safety Directive 2009/48/EC (DIN e. V.).
Safety note: No detachable decorative pieces, no loose glitter, no tiny beads – anything that can be picked off quickly ends up in a mouth.
For lettering, acrylic markers or paint pens are often the sturdier choice compared to felt-tip pens. Felt-tip pens look nice at first, but depending on the surface they fade faster or bleed when wiped with a damp cloth later. And anything that smells strongly or stays sticky for a long time is welcome to stay in the craft cupboard.
Ideas: a growth chart with name, birth details & small memories
Good design lets the scale breathe and sets accents only where there’s room. Here are ideas that have proven their worth, without ending up with “too much of everything”:
- Growth chart with a name: Name at the top, with a small symbol (star, cloud, animal) underneath.
- Height chart with birth details: Birth date, time of birth or weight/length – only if you really want it on there (and it stays easy to read).
- Color border: A narrow strip of color on the left or right, with the scale left clear.
- “Milestones”: Subtle markings for starting school, the first tooth (if you like that) or a move – better small and consistent.
- Growing row of animals: Three to five little animals along the edge, getting “bigger” toward the top.
Practical tip: Take a photo of the pre-sketch. If you touch things up later, you’ll still remember what the plan was.
If you’d like more inspiration: borrow ideas rather than improvising at night. In the article Height charts in the nursery: creative uses & gift ideas you’ll find more ways a height chart can look really lovely in everyday life.
Common mistakes (and how to avoid them calmly)
Most mishaps don’t happen while painting, but at the “oh, that’ll be fine” moment. Here are the classics from real life – including the remedy:
- Scale painted over: Happens quickly with large motifs. Solution: tape off the scale consistently and keep motifs at the edge.
- Too little drying time: One swipe and – smudge. Solution: let it dry, overnight if necessary.
- Too much decoration: Looks great on the table, restless on the wall. Solution: lettering first, then 3–5 small motifs at most.
- Wrong varnish: It can smear or yellow. Solution: test on an inconspicuous spot first and follow the manufacturer’s instructions.
- Mounted crooked: Turns every measurement into a guessing game. Solution: spirit level and check twice.
Care & sealing: keeping your height chart beautiful for a long time
A sealed surface forgives everyday life better, but gentle care works without it too. For cleaning, the rule is usually: wipe with a damp cloth, stay mild, don’t scrub. For many Bieco products, the care instruction is “clean with a damp cloth and mild soap” (see e.g. Bear height chart).
Sealing is especially worthwhile if the chart is touched often or wiped with a damp cloth. Important: the clear varnish must suit the surface (wood, lacquered, printed) and shouldn’t make the scale harder to read. Always test on an inconspicuous spot before you do the whole surface.
Our experience from everyday parenting: acrylic markers on smooth wood often hold up well if you really let them dry through. For us, “touched too early” was the biggest enemy – not the pen. Since then: coffee first, then let it dry, then touch. Northern German science.
A ready-made alternative: if you want to give a personalized height chart as a gift
A ready-made personalized height chart is the stress-free solution when time or nerves are short. It’s especially popular as a gift for a birth, christening or birthday: personal, but without a craft evening full of varnish fumes.

For browsing, here are matching overviews – one general and one with personalization. Take a look at the height charts or go straight to the personalized height charts. And if you’d like to figure out first which length suits your wall: What size should a children’s height chart be? All the info & recommendations helps with planning.
FAQ
Which pens last on varnished wood?
On varnished wood, acrylic markers or paint pens often hold better than ordinary felt-tip pens. What matters, though, is the specific varnish surface (matte/glossy) and the pen itself. Always test on an inconspicuous spot and let the lettering dry completely before you seal it or hang the height chart.
How long do acrylic markers take to dry on a height chart?
Drying time depends on the marker and the surface, not on your patience. Thin lines usually dry faster than thick filled areas. Rely on the manufacturer’s information on the pen and rather plan extra time before you peel off masking tape or apply clear varnish.
How do I mount the scale correctly from the floor?
What’s right is whatever suits the model: either 0 cm at the floor or a defined gap. Check the instructions or product page, mark the zero point neatly and align the height chart with a spirit level. If a gap is intended, measure it exactly and use it the same way every time.
Do I have to seal a height chart after personalizing it?
No, but it often makes sense if the surface gets touched a lot. A transparent seal can protect the lettering and motifs from wear. Make sure the varnish suits the surface, and test it on an inconspicuous spot first so nothing smears or looks worse.
What are typical mistakes when personalizing?
The most common mistakes are: scale not taped off, touched too early, too much decoration. Tape off the scale consistently, let markers really dry through and use motifs sparingly. That way the height chart stays easy to read and still looks tidy months later.
One last thought: a personalized height chart is less a craft project and more a family ritual. If it hangs straight, is easy to read and makes you grin as you walk past, you’ve done everything right. If you’d like to look at a ready-made base or a personalized version, you’ll find inspiration at Bieco in the height charts and the personalized height charts.